In this article we will focus how to maximize your ability to use a throw bag, including breaking down throwing techniques, advantages of different bags, where to rig your throw bag, how to place yourself in a position to affect a whitewater rescue and other uses for throw bags.
The most important aspect of throw bags is practice. As our friend Santi says “If you care about your friends practice your throw bag, if you don’t want to have any friends don’t practice your throw bag.” When carrying and deploying a throw bag it will most likely be used to save someone else. It is probably the most selfless piece of kayaking and rafting safety gear we carry and use.
Selecting a Rafting Throw Bag
When selecting a throw bag prioritize finding a bag that you can throw well – you’ve got to be able to get the line to the swimmer. The second priority is having a rope that the swimmer can easily hold. These priorities are mainly controlled by the rope length and diameter. After this consider all the other variables: strength of the rope, ease of stuffing and deployment, how the bag adheres to the clean lines principle, durability, colorfulness and ease to rig. Be sure to buy a throw bag for water sports, these ropes are designed to float.
Waist Throw Bags
A veteran river runner I respect greatly was using a waist throw bag years ago. I commented how I never really use a throw bag so I didn’t see the point in wearing one. He replied that he never used one until he started wearing one and then he actually had it available when it was useful.
On trips where I’m in and out of my raft a bunch I’m a fan of a waist throw bag. It allows me to have my hands free and still be ready to affect a rescue. Since the waist bags only contain around 55 ft of rope, I like having it in combination with a 75′ spectra throw bag in my raft in case I need to reach something farther away or I’m going to need to put some force on the line.
Avoid waist bags like the salamander throw bag where you throw the belt as well. Flying buckles hurt and it is much more challenging to throw with the waist belt. My one issue when paddle guiding is I find the waist throw bag makes it harder for me to slide into the bottom of the raft.
Popular Throw Bags for Rafting and Kayaking
| Throw Bag | Length | Diameter | Strength | |
|---|---|---|---|---|
| Scotty #793 Throw Bag w/ Floating MFP Line Easy to hold, cheap, weak, short rope | 50 ft | 9/32″ | 550 lbs |  |
| NRS Standard Rescue Throw Rope Solid basic throw bag | 75 ft | 3/8″ | 1900 lbs | 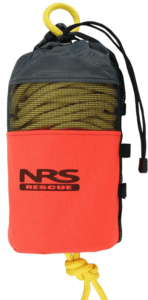 |
| Kokatat Huck Throw Bag Well made, easy to throw, clean, strong rope Cheaper + better than NRS Compact Bag | 70 ft | 1/4″ | 2495 lbs | 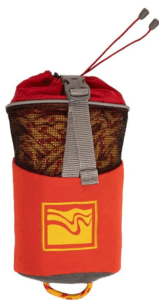 |
| NRS Pro Guardian Wedge Waist Throw Bag Favorite US waist throw bag, strong rope, easy to throw | 55 ft | 1/4″ | 2495 lbs |  |
| NRS Pro Rescue Throw Bag Best for Mechanical Advantage Rescues | 75 ft | 3/8″ | 5237 lbs |  |
| NRS Pro Compact Rescue Throw Bag Light, Easy to throw, strong enough rope The Kokatat Version above is a little better | 70 ft | 1/4″ | 2495 lbs | 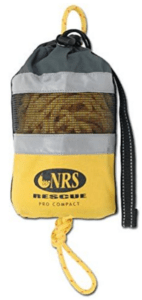 |
Rope Length
Ideally your rope is the longest possible that you can throw. The rope can potentially be a little longer if you pull out a few coils before throwing. Throw bags typically range from 50 to 75 ft. The shorter ropes are easy to throw but many times they aren’t long enough. Ropes between 65 and 75 feet seem to work for most throwing rescue situations.
If you also want to use the rope for a mechanical advantage than you’ll want 75 feet which will still be too short for many mechanical advantage situations. Hopefully you’ll also bring a 200 ft static long-line for these situations.

Rope Diameter
The smaller diameter ropes (1/4″) are easier to throw but more difficult to hold on to when pulling and when being rescued. A 3/4″ rope is ideal for grabbing. The smaller bags typically use smaller, weaker ropes than the larger bags with 3/4″ ropes. For example with a 3/8″ polypropylene is rated to 1900 lbs and the 1/4″ polypropylene is 900 lbs. Kayak throw bags typically use smaller diameter ropes so the corresponding smaller bag fits easily within a kayak.
Rope Tensile Strength
Personally I prefer strong throw bags with spectra line or equivalent. Most of the time I’m using my throw bag to either get someone off a rock (more on this later) or to pull a perched raft off a rock. Many polypropylene lines are rated to only 950 lbs. Put a knot in the line and you loose around 30% of the static strength (making it around 665 lbs).
Many times I’ve started pulling a raft off a rock using a throw bag and than a few other people start helping. Pretty quickly you can get close to the breaking strength of the line. Also, repeatedly putting forces close to the tensile strength of a rope will slowly wear it down until it fails.
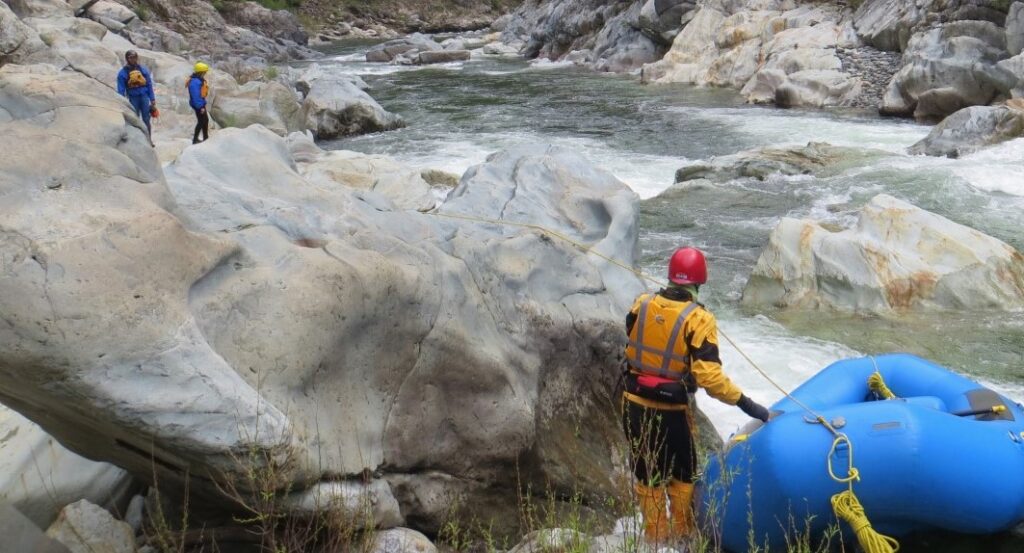
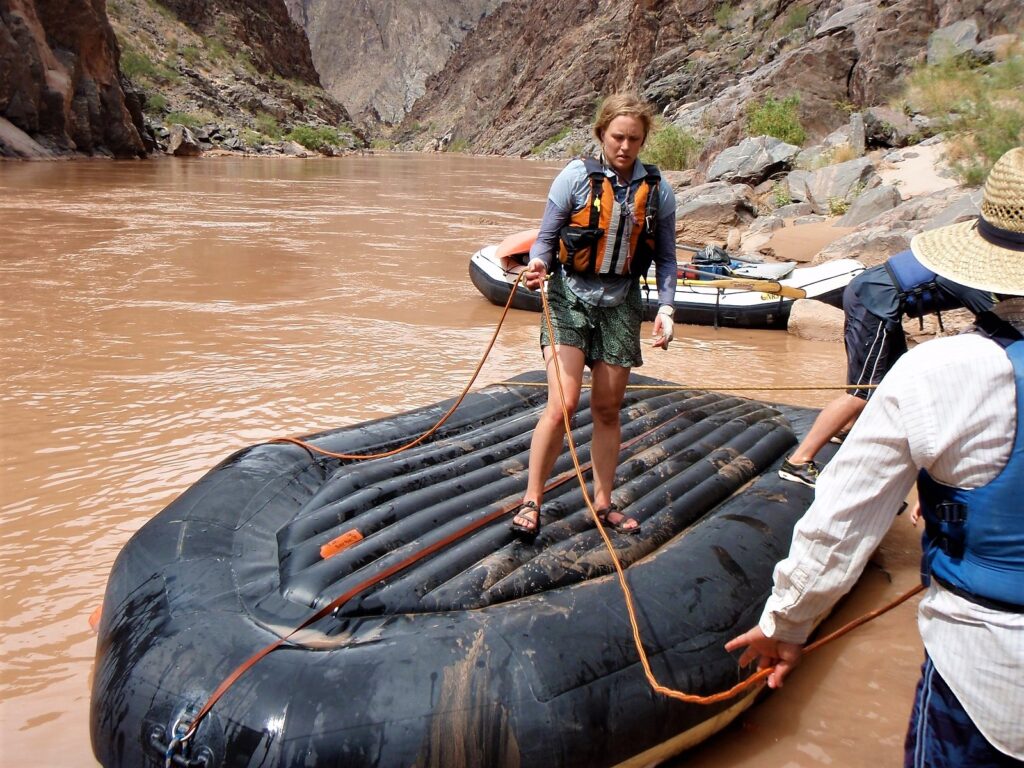
As you can see from many of the photos, I’ve used throw bags way more often for lining rafts than rescuing swimmers, having a more durable rope is best for this. Finally as ropes get older they also loose strength. For all these reasons I prefer having extra strength in my line so I don’t have to worry about it failing. People get hurt when ropes fail and it is not worth the risk.
The spectra lines are heavier and stiffer than the polypropylene lines making them harder to throw and stuff into bags. However, for the same diameter of rope the spectra lines are over twice as strong. The biggest reason you don’t see more commercial outfitter using them is the significant added cost.
Throwing Techniques
Don’t let go of the rope. A loose throw bag floating downstream is extremely dangerous.
There are many ways to toss a throw bag. The most important aspect of technique is finding one that you are comfortable with and can consistently rescue a swimmer. Your number priority when practicing with throw bags is to have a system to ensure you never let go of the end of the rope. If you do, you are making the swimmer’s situation more dangerous than it was. Consider, taking some rope out of the bag in a couple of coils before throwing, this makes the bag a little lighter and easier to throw plus it means you have some extra rope to work with so you are less likely to let go of the rope.
Common throwing techniques include the overhand (football, pinch), underhand, and sidearm. Equally import is finding a way to hold the bag. I prefer pinching part of the opening with my thumb and forefinger, while others I know have success using the strap.
Throw Bag Practice
Once again, the key is practicing enough with a technique that works well for you. Practice throwing techniques on land where you toss the bag back a forth with a friend without having the rope deploy. Later practice deploying the rope on the land. Finally practice rescues in the river.
Underhand Toss
By far the most used technique, the underhand throw works well in most white water rescue situations. This technique allows throws to have the best balance and least likely to fall over – helpful on rocky terrain. Underhand also makes it easy to aim and release the bag in the direction of the swimmer. After throwing, the rescuer ends up in a good position to start pulling on the rope. The technique seems to allow people to throw the farthest with the least amount of torque on their bodies.
Overhand technique
This technique works best when the situation precludes the underhand technique, such as standing in knee high water that would interfere with the underhand technique. The overhand technique places grater stress on the throwers shoulders. It is also harder to maintain balance with this throw. Still some people prefer this throw as it is quicker to throw because it doesn’t required the long wind-up of the under hand throw.
I find I end up hitting swimmers in the face with the throw bag much more often with the overhand throw. While with the underhand throw the bag goes past the swimmer allowing them to grab the rope.
I use the overhand throw a little more often when someone is stuck on a rock in the middle of the river. It is easier to hit them in the chest with the bag so they don’t have to deal with pulling the bag up out of the river.
Side Arm Technique
This also works when in place of the underhand technique. I find the side arm the most challenging to line up with the swimmer and I am less consistent with this technique. It is easier on the shoulder and requires less strength to throw the bag than the overhand technique.
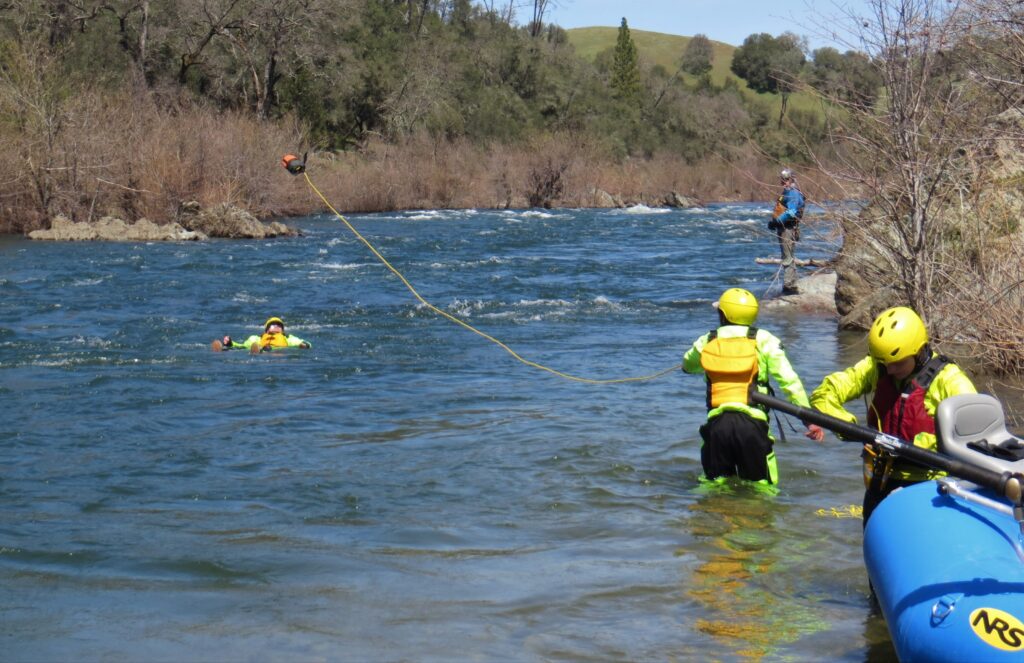
Video: Throw Bag Rescue Of a Swimmer
Affecting a Rescue for a Swimmer
- set up in a good spot to throw – stable spot on shore or tied off raft, has downstream eddy, where swimmers are on the surface, consider what happens if you get pulled from your spot
- reach with your voice, yell “Rope” try to make eye contact with swimmer
- throw the bag directly across them so the rope lands on top of the swimmer
- be prepared for the coming load, sit down, have a second person grab your PFD for support, or depending upon the footing use a dynamic belay where you walk downstream reduce the load
- consider tying off the end of your throw bag to shore when setting safety
- never wrap the rope around your hand or body
Rescuing Someone Stuck on a Rock
- throw bags work well for rescuing swimmers stuck on a rock in the river
- best if technique is covered in safety talk
- have rescuee catch bag and pass all extra rope to shore
- once given the “OK” signal, rescuee slids into the water holding rope near throw bag
- rescuer pulls/belays swimmer into shore
Clean Lines Principle
One of the scarcest things I’ve seen happen to a raft while surfing is a throw bag got open and the rope was getting wrapped around everyone. Following the clean lines principle means trying to minimize the entrapment hazards, particularly in regards to ropes.
Tuck in the End of the Rope
Using the principle tuck the end of the rope into the throw bag. Having the end of the rope sticking out of the bag makes it much easier for the rope to come out of the bag. I’ve seen this happen even when the loop is clipped through the strap that goes over the top of the bag.
Keep the Tail Clean
Minimize the length and size of the loop on the back end of the bag while still having a proper tail (one hand width) on the knot. Keep the strap on the top of the bag tight. Depending upon how you rig your throw bag consider using the strap to attach it instead of a carabiner. Throw bags flop around much more when attached with a carabiner and the carabiner is one more hard thing to hit. Also when clipping a carabiner to the bottom of the throw bag I’ve multiple times seen the knot in the rope pull through the bottom and the bag start loose rope.
Knotting the End of your Rope
Advantages of a knot at the loose end of the rope include being easier to find and it can be readily clipped with a carabiner. The knot also makes it less likely that the end of the rope will slip through your finger tips and the whole thing will head downstream creating an entrapment hazard. While, I have seen lots of strong opinions, I have not seen any good research on whether we should be more concerned with keeping the rope out of the river or minimizing the possibility of the rope chalking once in the river.
The main disadvantage of the knot is that it increases the probability the rope could chalk between rocks and get stuck in a river if a rescuer dropped the rope in the river creating a hazard. Having the knot in the same place for a long time creates more wear in the rope and if you are using the rope with a pulley the end can’t slip through the system. Some throw bags use a different color wrap on the end of the rope to make it easier to find.
Where to Rig
Rigging a throw bag inside the raft within reach of the guide is best. Having the throw bag near guests (non-guides) can be a problem when they think they should use the bag to affect a rescue, yet don’t have the knowledge, practice or skills to do so. Hanging the throw bag from the outside of the raft can make sense a when rafting at high water. However, on low volume runs having the throw bag on the outside of the raft leaves it prone to be ripped off the raft by a rock.
More Throw Bag Best Practices
- During the safety talk let guests know that if they find themselves floating down stream with a rope that a rescuer dropped to let go of the rope and get away from it.
- UV is hard on bags, Cordura is best material.
- UV breaks down ropes quickly, particularly polypropylene ones, keep lines out of the sun.
- Mesh siding on throw bags wears out more quickly and doesn’t help the longevity of the rope. Throw bag ropes are basically made out of plastic and don’t need to be dried out.
- An attachment point that goes across the top of the bag seems to hold up best. Attachment points on the side or if they are only attached in one spot pull out over time.
- Take extra line out of the bag before throwing or just throw a few coils
- If the swimmer is close enough just throw a few coils instead of the entire bag
- Lining rafts with a 75 ft throw bag works well. Be sure to manage the line well by keeping clean coils
- Consider having a 200 ft static line in addition to your throw bag(s)
Final Thoughts on Choosing a Throw Bag
Throw bags lost in rivers create a major entrapment hazards. Be sure to rig your throw bag so you will not loose it. If using your throw bag, do not let go of the end of the rope – you have a responsibility to keep the rope from becoming a danger to others. People who loose throw bags in the river typically haven’t practiced with them enough. Buy a bag that you can easily throw and practice with it! Then practice with it more.